1.
From the Setup tab, choose the Account
tab, and then click the Custom
Fields tab. The Custom Fields List displays.
2.
Click New Custom Field. The New Custom Field page displays.
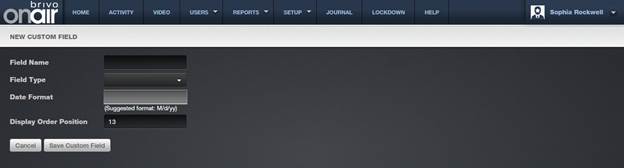
Figure 60. Add a Custom Field Definition
3.
Enter a brief, descriptive Field Name.
4.
From the dropdown list, click a Field Type.
5.
If the Field Type is Date,
enter a Date Format, such as MM-dd-yyyyy. Only dates entered in the specified format will be valid on data
entry pages such as New User or Edit User.
|
|
NOTE: You must use MM, with capitalization, to signify months in the Date Format field. Lower case mm will be read as minutes by the application. Also, DD is used to indicate the day of the year and can therefore have
a value of 1-366, while dd is used to indicate day of the month and can only have a value
of 1-31. |

6.
In the Display Order Position field enter the number indicating where this
custom field should appear in the list of fields. For example, if you enter 1, this field will appear first. By default, the new field is
assigned the highest number possible, but you can easily change it. So, if
there are 11 fields already, when you create a new one it will be assigned the Display Order Position of 12, but you can change that to any number from 1 to 12.
|
|
NOTE: The Display Order Position is significant because Custom Fields 1, 2 and 3 are the only ones to display on the
User List. |
7.
Click Save Custom Field. You are returned to the Custom Fields List with
the new field listed in the order you specified.