1. From the Setup dropdown
menu, choose the Accounts tab and click on the Account Settings link. The Account Settings page displays.
2. If you would like all users to be created as suspended, check the Create Users as suspended box.
|
|
NOTE: By default, new users are created as activated. In order to
create users as suspended, the box must be checked. |

3. To enable the self-serve password reset option on the account,
check the Enable self-serve password
reset box.
4. To enable soft lockout for self-serve password reset, check the Enable soft lockout box. Choose the
soft lockout timeout period by filling in the box. The default is one minute.
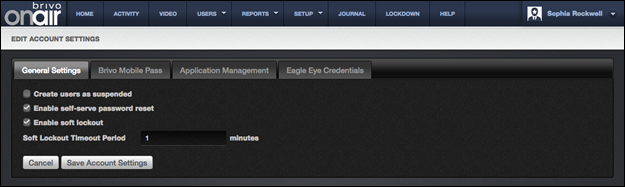
Figure 88. Edit General Settings
5. For administrators using Brivo Onair Pass, click on the second tab
on the Account Settings page, Brivo
Onair Pass. The Brivo Onair Pass tab displays.
6. To enable Brivo Onair Pass functionality, check the Enable Brivo Onair Pass box. To display
a particular logo when assigning a Brivo Onair Pass, click on the Upload Logo button and a Select Image File popup window appears.
Select an image (.gif, .jpg, or .png file types only) and click the Upload button. This logo will appear
when you assign a Brivo Onair Pass to a user.
|
|
NOTE: By default, Brivo Onair Pass functionality is enabled providing
each account with 5 free Brivo Onair Passes when the account is created. |
7. To utilize the Trusted Network Policy functionality in your Brivo Onair
account, locate the site that you want to activate from the available list and
click on the + Add Network button.
The Input Network SSID field will
appear.
|
|
NOTE: The Trusted Network Policy ensures your Brivo Onair Pass holders
only open doors when connected to the verified network name entered for each
site. |
8. Type in the Network SSID
(usually the name of the WiFi network) and click on the Confirm Network button. The grey Off button will change to a green On button and the WiFi network name (Network SSID) will appear. To
remove a Network, click on the grey
minus symbol (-) next to the Network
name. If this is the only Network,
the green On button will change back
to a grey Off button.
|
|
NOTE: To view a subset of the sites based on name, type in a single
letter or group of letters in the Site
filter. The page automatically refreshes, displaying only those sites related
to that letter(s). Click on the Clear
button to return to the complete list of sites on the account. |
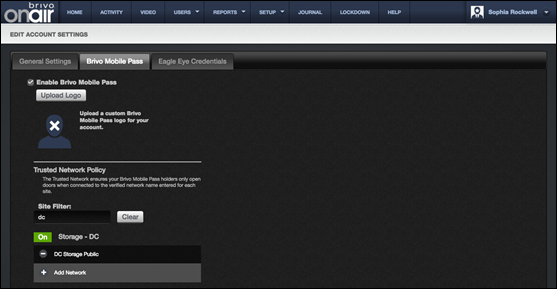
Figure 89. Brivo Onair Pass Settings
9. For administrators using Brivo Onair API integration, click on the
Application Management tab on the
Account Settings page. The Create a New Application page displays.
10. Enter the Application Name,
Description, select an Authentication Type, and enter the Redirect URL and click the Create Application button. The
information entered will appear in the Account
Owned Applications field below.
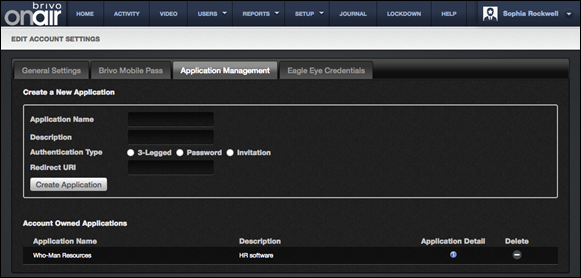
Figure 90. Application Management
11. Clicking on the Application
Detail button reveals the Application
Details popup window with a list of Client ID, Client Secret, Grant Types,
and Redirect URL.
12. To delete an account owned application, click on the Delete button.
13. For administrators using Eagle Eye integration, click on the Eagle Eye Credentials tab on the
Account Settings page. The Eagle Eye Credentials tab displays.
14. Enter your Eagle Eye Account
Username and Account Password in
the fields provided and click Save.
15. Once the Eagle Eye Credentials have been saved, you will receive a
green message saying that your Eagle Eye credentials are verified and saved.
Two new features are now enabled when this process is successful.
16. You may click on the View
Eagle Eye shortcut button on the Home
page which will take you to the Eagle Eye user interface using the Eagle
Eye credentials you entered.
17. Additionally, you now have the capability of adding Eagle Eye
cameras to your Brivo Onair account via the Eagle Eye Credentials tab under Setup/Account Settings.
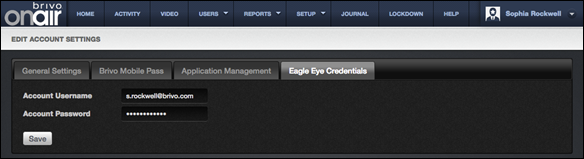
Figure 91. Eagle Eye Credentials
18. Once finished, click Save
Account Settings.