1. From the Reports tab,
click on the My Reports tab, then
click on the Report Configurations
tab. The Report Configurations page displays. Select the report you wish to
create a schedule for. Click on the Create Schedule link. You are taken to
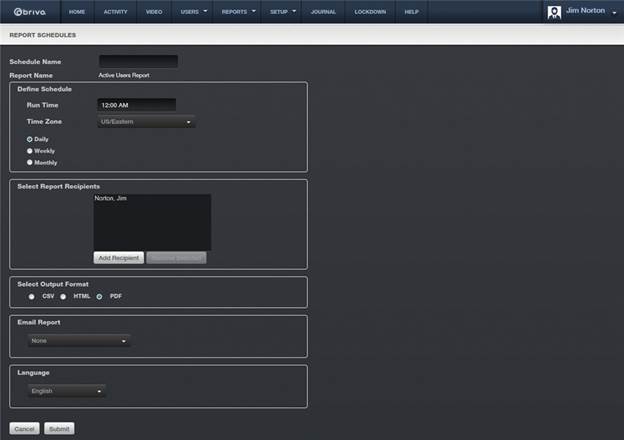
the My Reports Create Schedule page.
2. Enter a Schedule Name
for this schedule.
3. In the Define Schedule section,
report schedules can be set up to run daily, on certain day(s) of the week, or
on specific day(s) of a month.
|
|
NOTE: To select the last day of the month, simply choose Monthly and
then select the 31st day. Even if the month has only 28 or 30
days, selecting 31 automatically configures the report schedule for the “last
day of the month.” |

4. Select the time and date. To select multiple days of the week or
month, hold down the CTRL key when you select the days of the week or month.
5. Under Select Report Recipients, the name of the current
administrator will automatically appear.
If additional recipients are wanted, click on the Add Recipients link. A list of administrators will appear. Click on
whichever administrator you want and that administrator will disappear from the
list and appear in the Select Reports Recipient box. When finished, click on the Close Window link and you are returned
to the Report Schedule page.
6. Under Additional Emails,
if additional recipients who are not administrators are wanted, check the Additional Emails checkbox and then
enter the email(s) separating them by commas.
7. Select the report Output Format.
Formats available are CSV, HTML, and PDF.
8. The Email Report
dropdown menu defaults to none, but also allows the Report Recipients to be
notified via email (the email listed in the admin profile) that the report has
been run or to be notified and to have a copy of the report included as an
attachment to the email.
9. When finished, click Submit.
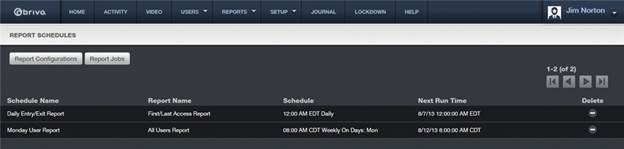
You are returned to the Report Schedule Details page. Click on the Report Schedules button and you are
returned to the Report Schedules list page where the report is now listed.
10. At the scheduled time, the report will automatically generate using
the format selected.