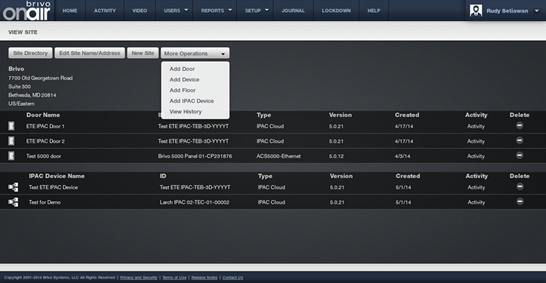
From the Setup dropdown
menu, choose the Sites/Doors tab
then click the Site tab. The Site List
displays.
Click the site to which you want to add an IPAC device. The View
Site page displays.
Click More Operations and
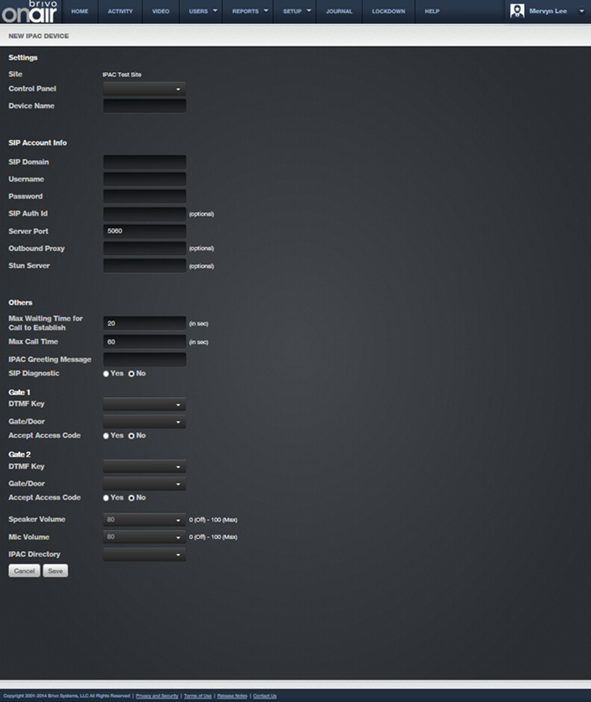
select Add IPAC device. The Add IPAC device page displays.

Figure 172. Add an IPAC device to a Site
Select a Control Panel from the dropdown list
Enter the name of the IPAC device in the Device Name field.
Enter the SIP Domain.
Enter the Username.
Enter the Authorization ID if required.
Enter the Password.
Enter the Server Port (the default is 5060).
If required, enter the Outbound Proxy information and the Stun
Server information.
Enter the maximum call time in seconds (the default is 60).
Enter the maximum waiting time for the call to establish in
seconds (the default is 20).
Enter an IPAC Greeting Message.
If SIP Diagnostics are required, click the Yes button. Do not click
the Yes button if SIP Diagnostics are not required.
For Gate 1, select the DTMF key from the dropdown list.
Select the Gate/Door from the dropdown list. If the Gate/Door can
Accept Access Code, select Yes.
|
|
NOTE: The DTMF (Dual Tone Multi Frequency) Key is the number a tenant
would push on the telephone keypad to grant entry to someone calling from
outside. |
Complete steps 16 and 17 again for Gate 2.
Enter the Speaker Volume (Zero Off - 100 Max) (the default is 80).
Enter the MIC volume (Zero Off – 100 Max) (the default is 80).
Select the IPAC Directory from the dropdown list.
When finished, click Save.
