1.
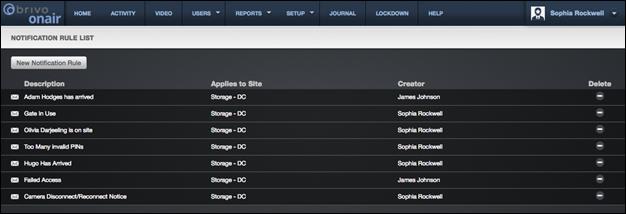
From the Setup tab, click on the Notifications
tab, then choose Notification Rules.
The Notification Rule List displays.
2.
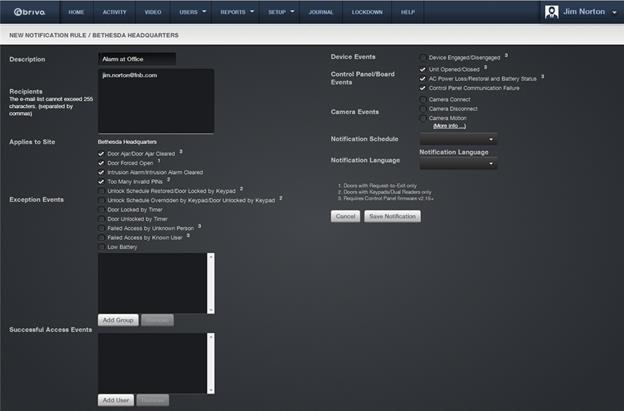
Click on the New Notification Rule
button. The New Notification Rule page displays.
3.
If there are multiple sites defined
for an account and you can view more than one of them, you will be prompted to
select a site to which the rule applies.

Figure 167. View Notification Rule List

Figure 168. Create a Notification Rule
4.
Enter a brief Description, such
as “Robert’s Door Ajar Events.”
5.
Enter one or more email addresses in
the Recipients field. Multiple addresses must be separated by commas.
6.
Select each desired Exception Event,
Successful Access Event (by group and/or by user), Device Event, Control
Pane/Board Event, and Camera Event.
7.
From the Notification Schedule dropdown list, click the schedule during
which the notification rule should be enforced. The identified recipients will
only receive emails about events occurring during the selected schedule of
time.
8.
From the Notification Language dropdown list, select the language in which
you want to receive the notification.
9.
Click Save Notification. The
Notification Rule detail page displays.