1.
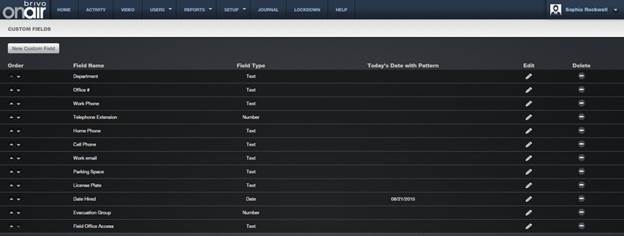
From the Setup tab, choose the Account
tab then click the Custom Fields
tab. The Custom Fields List displays.

Figure 59. View Custom Fields List
Only the Master Administrator and all
Senior Administrators can view, create, edit or delete custom fields.
Features of this page include:
Click the Up arrow associated with any
custom field to move it up in Order.
Click the Down arrow to move it down.
|
|
NOTE: The Order is significant because the first three will display on the
User List. |
The Field Name indicates the type of data
stored in the field.
The Field Type indicates if the field is
used to store text, numbers or dates. If dates are selected, a column showing
today’s date with pattern will be displayed.
Click
Edit to change the field name or order.
Click
Delete to remove a specific custom
field from the account.
