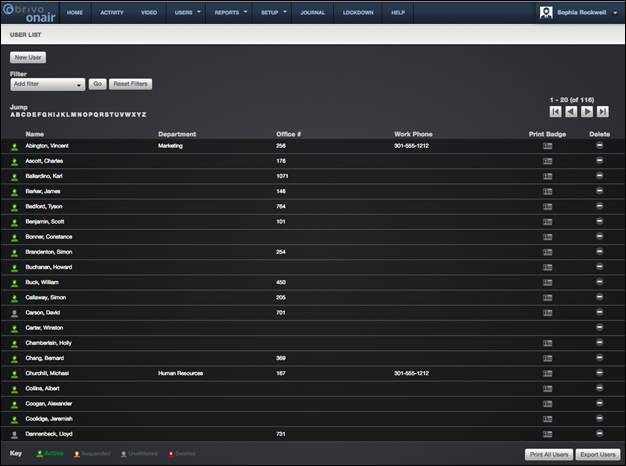
1. From the Users tab,
click on Users. The User List
displays.
Your Administrator permissions determine which users display on
this page.
The Master Administrator and all Senior
Administrators can see all users in the account.
Assistant Administrators can see only users
who belong to groups for which they have View privileges. See Editing Assistant Administrator Permissions for more information.
Features of this page include:
To Filter
the user list page by selecting from the dropdown menu. For example, to locate
all users whose last name contains the letter S, select Last Name from the filter, type “S” into the text field
and click Go. The results will display below.
To Jump
to any point in the alphabet, click a letter in the alphabet bar at the top of
the page. For example, to locate the user “Tom Smith,” click the letter S.
Letters with no corresponding last names are grayed out.
To scroll forward in the alphabet, click the
right arrow in the top right corner. To scroll backward in the alphabet, click
the left arrow. To the left of the arrows, the system indicates which set of
user records you are currently viewing, i.e., 1-20 (of 25).
The icon next to each user name indicates that
user’s current status: Active (green icon), Suspended (yellow icon), Deleted (red
out icon), or Unaffiliated (grey icon). Unaffiliated users are users who do not
belong to any group and therefore have no access privileges. Additionally, an
administrator may click on the icon to suspend or reinstate the selected User.
When the administrator clicks on the icon, a pop-up window appears informing
the administrator of the status change. For example, if Joe Smith is an active
user, the icon will change from green (Active) to yellow (Suspended) when the
administrator clicks on it. When the administrator clicks on it a second time,
it will change back to its original status.
|
|
NOTE: All Administrators can view unaffiliated users. |

To view information about a user, click the
user’s name. The User detail page displays.
The first three custom fields from the User detail page display on
the User List. In the example above, Department, Parking Spot, and License
Plate are all custom fields. For information about renaming the field labels,
please see Managing Custom Fields.
To print a badge for a user, click the Print
Badge icon associated with that user’s name to access the Print Badge page. See
Managing Badges for more info.
To delete an individual user, click the delete
icon next to that user’s name, and then click OK in the confirmation
window.
To locate a deleted user, use the filter
dropdown to select Status, choose Deleted, and click Go. The page will refresh. Deleted users are represented by a red
icon with a white X. You can view, but not edit, the details of a deleted user.
|
|
NOTE: Only the Master Administrator and Senior Administrators can view
deleted users. |
Click Print All Users to generate a
report of the users in the account. The report does not include deleted users.
Click Export
Users to run a User Export report in .zip format. The zip file will contain
a folder containing the users list in .csv format as well as a folder
containing pictures associated with each user. The pictures are named to match
the User ID of each user.